

Introduction: How to Make a Floating Faucet Fountain

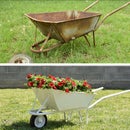


In this Instructable I’m going to show you how I made a floating faucet fountain. I saw this fountain a year ago, and I really wanted to make one for my backyard.
Although it seems like a complex project, it is actually very easy and it doesn’t take too long to build. So, follow my instructions and create your own magic faucet fountain that will amaze everyone around you.
These are all the tools and materials needed for this project:
Materials:
- Galvanized Rustic Metal Bucket https://amzn.to/2DM7dyv
- Water faucet https://amzn.to/2LsMmq4
- Rigid acrylic tubing https://amzn.to/2ViAhrZ
- Water pump https://amzn.to/2PNEGxa
- White pebbles https://amzn.to/2H6uvA6
Tools:
- Soldering station https://amzn.to/2VfRO44
- Cordless drill https://amzn.to/2Jk27gm
- Drill bit set https://amzn.to/2LplKpU
- Glue gun https://amzn.to/2Lzvazw
- 5 min epoxy https://amzn.to/2YdZ65F
Step 1: Basic Materials Needed for This Project.

For this project I bought a galvanized rustic metal bucket, but you can use any other kind of waterproof container. It can be rustic or modern, metal or plastic, larger or smaller, it's all up to you.
Also, I choose white river rocks to fill in the bucket. Another options are black rocks, clear glass stones, colored glass stones, whatever works for you.
The most important thing you need for this project is clear rigid plastic/acrylic tubing. Remember, you need rigid, not flexible tube. You can find the link to it in the tools and materials list above.
Next, is the water pump. I have a submersible water pump, which is silent and very easy to install, so I highly recommend buying one for this kind of project.
Lastly, I found a cool looking faucet or spigot. When buying one make sure the hose end fits the plastic tube.
Step 2: Making a Hole at the Bottom of the Bucket.


Now, let's start with this project!
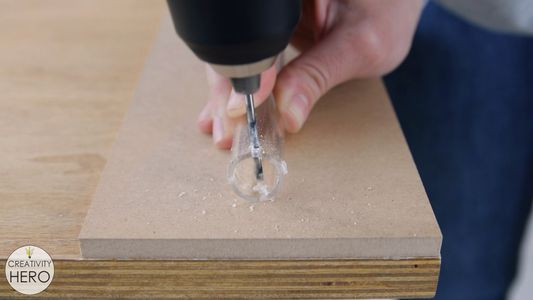
The water pump goes at the bottom of the bucket. In order to hide the cord, I need to drill a hole at the back of the bucket and run the cord through.
I took my cordless drill, attached a 6 mm drill bit, and easily drilled that hole.
If your pump comes with a plug at the end of the cord, you'll have two options: to drill a much larger hole into the bucket, or to cut the cord, and solder it back later. It's up to you.
Step 3: Adding a Jacket to the Wires of the Pump.


The pump has two exposed wires, black and red without a jacket, so I decided to cover them with black heat shrink tubing. The wires are 46 cm long, but I cut 44 cm of the heat shrink and left 2 cm of the wires exposed, which I'll use later.
I covered the wires and used a lighter to shrink the whole heat shrink. I think it looks much better now.
This step is optional. You might have another type of pump, so you won't need to do anything with it.
Step 4: Soldering.


Once I was done with the cord, I placed the pump at the bottom of the bucket and pulled the cord through the hole.
I added another piece of heat shrink at the end of the wires, which will protect the exposed wires later.
Then, I stripped the insulation of the black wire just a little bit more with wire strippers. Now the wires are ready for soldering to the power jack.
First, I soldered the red wire onto the shorter tip of the DC power jack, and then I soldered the black wire onto the longer tip of the DC power jack.
Finally, I shrank the short heat shrink piece to insulate the connection of the wires with the power jack.
Step 5: Drilling Holes Into the Rigid Acrylic Tubing.


I bought this clear rigid acrylic tube one year ago, didn't knowing that I'll make such amazing project out of it. It is 50 cm long and has 20 mm outer diameter. Maybe a thinner tube would create a better effect, but why not using something I already have in my workshop?
To get the desired effect I need to drill small holes in the top of the tube. That way the water will be able to easily flow, first going all the way up, and then going down the tube.
So, I drilled 8 holes in total with 3 mm drill bit, making sure they're really close to the top (around 3 mm away) and equal distance apart.
The drilling process created some burrs onto the acrylic, which I removed with a sandpaper. I hand sanded on the inside and on the outside as well. This step will help make strong bond with the glue.
Step 6: Attaching the Faucet to the Acrylic Tube.

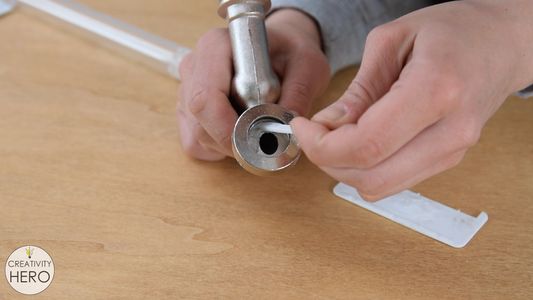

My choice of glue is two part epoxy. I mixed the epoxy well, and applied large amount of it inside the faucet. The sides of the faucet should not be covered with glue, because there we need to have enough space for the water to come out of the holes.
I attached the tube to the faucet and waited around 10 minutes to completely cure, before moving on to the next step.
Step 7: Attaching the Acrylic Tube to the Water Pump.


The other end of the tube needs to go above the pump. The nozzle of the pump is too small for the tube, but I think hot glue will fix this issue.
So, I applied generous amount of hot glue around the nozzle, and attached the tube while the glue was still hot. Then I applied hot glue on the outside as well. This way I'll make a strong bond between the tube and the nozzle of the pump, and the water won't leak, which is very important.
Step 8: Adding Natural River Rocks to the Bucket.


Before adding the rocks, I placed the tube in the center of the bucket.
I bought around 20 kg natural river rocks, which is enough for this large bucket. Holding the tube with one hand, I started pilling the rocks inside the bucket with the other hand. The rocks hold everything in place and give a character to the project.
Step 9: Connecting the Pump to the Power Supply.


Everything is in the right position, so I can seal off the hole where the cord is going through. I used hot glue to seal that hole.
With that done, I can connect the power jack with 12 V DC power adapter. If you have another type of water pump you might not need to use power adapter.
This means that I'm done assembling the fountain.
Step 10: Adding Some Water Into the Bucket.


The last step is to add water into the bucket. The amount of water you add depends on the pump, but mostly on your taste. I added just enough water to cover the pump, and make sure it works properly.
Then, I plugged the pump in and waited to see the final result.
And my project was a success. The water came up, started flowing along the sides through the holes, creating the illusion of floating faucet.
It came out wonderful! And the sound of flowing water is absolutely amazing!
Step 11: Enjoying the Magic Faucet Fountain.


Don't forget to watch the video for full experience!
What do you think? I'd like you to share your thoughts with me in the comments below!
If you like this project as much as I do vote for it in the Gardening Contest!
Also, follow me on social media and subscribe to my YouTube channel.
- YouTube: https://www.youtube.com/CreativityHero
- Website: https://creativityhero.com/
- Instagram: https://www.instagram.com/creativity.hero/
- Facebook: https://www.facebook.com/CreativityHero/
- Pinterest: https://www.pinterest.com/creativityhero/
Thanks! :D

Participated in the
Gardening Contest


