

Introduction: Blinds Control With ESP8266, Google Home and Openhab Integration and Webcontrol


In this Instructable I show you how I added automation to my blinds. I wanted to be able to add and remove the automation it, so all installation is clip on.
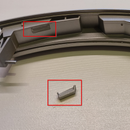
The main parts are:
- Stepper motor
- Stepper driver controlled bij ESP-01
- Gear and mounting bracket
I controll the blinds via Google Home, my Openhab server and a website.
You can still manually control the blinds, because when the blinds are not opening or closing automatically, the stepper motor is disabled.
Supplies
I bought most components form Aliexpress
ESP8266: ESP-01
I designed and printed the gear and mounting bracket myself
Step 1: Stepper Motor, Gears and Handles


I removed the gear from the curtain roller to re-engineer the gear in Fusion360. I experimented with different gears. Smaller gears gave a larger torque, but less grip on the ball-chain. A gear with 12 teeth worked best for me and I designed a mounting bracket to fit the stepper motor and the gear with the ball-chain.
I designed the handles to clip on the standard Luxaflex handles.
The STL files of all 3D parts are published on my Thingiverse page.
Step 2: Stepper Driver Hardware


The hardware consists of:
- Step down (buck) converter (12V to 3.3V) to power the ESP-01 and the A4988 stepper driver
- ESP-01 which connects to the WiFi network and controls the stepper driver (enable/disable, motor direction and steps)
- Stepper driver A4988
- Stepper motor (17HS4401)
- Some electronic components
I soldered the female connectors to a perf board and connected the components mentioned above.
Step 3: Software


The code is published on my Github.
Edit april 2020: a version with no MQTT and only webcontrol is added.
Edit april 2020: + 10% and - 10% is added to webinterface.
The program with MQTT control:
- Connects to the WiFi network and MQTT server
- Checks whether to state of the blinds is equal to the setting, if not it changes the state to match the setting. Then enable the stepper motor, execute the right number of steps. Disable the stepper motor.
- A setting can be received via MQTT or via the Webserver.
- The webserver may enter the HTTPUpdateServer mode to OTA update the firmware.
Disabling the stepper motor by setting the 'EN' pin of the A4988 driver is important to:
- Reduce the amount of current used by the device if the setting remains the same (vast majority of the time)
- Enable manual control of the blinds.
The HTTPUpdateServer is enabled at IP address/update. Before entering the update mode via the webserver, it changes the state to the CENTER state, since the program starts up in the CENTER state.
This is how I derived the number of steps:
The total length of cord between closed and opened is approximately 40 cm.
One revolution of the gear is approx. 7.5 cm.The total length of the cord is 40 / 7.5 = approx. 5.3 revolutions.
I don't want to stretch the cord and the device starts from the middle position, so I round it to 5 revolutions (2.5 in one and 2.5 in the other direction).
One revolution of the stepper motor is 200 steps, but I have set my stepper motor driver to quarter steps, so one revolution is 800 quarter steps. 5 revolutions is 4000 quarter steps (MAX_STEPS).
The close setting (CLOSE_STEPS) is 90% closed = 3600 steps; the open setting (OPEN_STEPS) is 10% = 400 steps.
The middle position (CENTER_STEPS) is 50% is 2000 steps and is the initial number of steps when the device starts.
Step 4: Assembly


My controller is shoven to the windowsill via the mounting bracket of the stepper motor
I designed a back end for the stepper motor containing the stepper driver and ESP-01.
Step 5: Home Automation

Original: I have a Raspberry Pi Zero running Raspbian Stretch lite, NodeRed and Openhab 2.4.0
Edit march 2021: I have a Raspberry Pi 3B running Raspbian Buster lite, NodeRed and Openhab 3.0.0
My Openhab items, rules and sitemap are on my Github.
Edit april 2020: + 10% and - 10% setpoint is added to Sitemap in Openhab).
Edit march 2021: I added the Openhab 3 description in the files.
See this Instructable how I set up MQTT on Openhab 3
In this case Node Red is only used for debugging purposes.
Google Assistant
The Google Home Openhab integration is described here.
If my TV is turned on via Openhab, blinds close according to the rule.
"Hey Google, set window blinds to 50"


