

Introduction: Let's Make a Crokinole Board!


Perhaps like some of you, I had not heard of Crokinole for much of my life. After my sister met and married a fine Canadian fellow, he introduced our family to the game and now our holidays include Crokinole tournaments around the dining table. Good times.
Official Crokinole boards have a playing circle of 26 inches. Some boards are made with a 24-inch circle to maximize the number of boards that can be made from a standard 4'x8' sheet of plywood, but by golly, I want to be official, so this here I'ble is for a 26" board.
The idea is to flick a disc from the outer circle and land it in the inner ring, but you can't score unless the opposing player has no discs on the surface, so you also have to use your discs to knock opposing discs off the board. The full set of rules are easy to find online. It's a fairly straight forward game, easy to pick up, tons of fun and quick to play. The only challenge is that the boards themselves are hard to come by.
Sounds like a chance to get out to the shop and have some fun.
Download and reference the accompanying PDF for some of the build plans.
I've got a video of this build as well. One note on the video version. I make discs as well in the video, but I don't recommend doing so after going through the process. Discs are pretty cheap, build the board, and buy the discs.
Attachments

Supplies
Part of the fun is changing the colors and contrasts on the board, and thankfully most of the material is plywood. Use a decent grade of ply, but then you can use different stains or accent wood to make the board your own. I used this combination:
Material:
3/4 ply for the base
1/2 ply for the playing surface - (Stained dark for contrast)
Walnut outer trim
Tools used:
Miter saw and/ or Table saw
Hand-held router. A palm-sized router is ideal. 1/4 and 1/16 straight bits used.
Drill and bits
Wood glue and clamps
Brad or pin nailer
Step 1: Circle or an Octagon Base?


The playing surface is a large circle, but the game has an outer tray and wall to catch stray discs that are knocked off the board. You'll see this outer wall made as either a larger circle or an octagon. When made as a circle, the process is likely to use long, thin strips of wood to wrap around the base several times, being laminated into the final circular wall.
I chose instead to create the octagon outer shape, which seemed a bit simpler and I liked the look of it better anyway.
I made the base from 3/4 plywood, cut into 6" widths. (You could also use 1/2" ply.) Being an octagon, we'll be cutting 8 pieces with a 22.5 deg angle on each side. You can cut these easily by making a cut, flipping the board, making the next cut, and repeating this process. I just set up a stop block at my miter saw and this went quickly.
When attaching these together I used some dominos to help line them up, but this isn't necessary. You could also use a biscuit joiner for this purpose, but really you can just use glue for now. Even though it's a series of somewhat weak butt joints at this point, once the playing surface is glued down on the base, that is a massive amount of strong glue surface and it's gonna hold together just fine.
For the base, I suggest gluing the segments together 2 at a time, then into halves and test the final fit. Any minor errors in the 22.5 deg angle will show up and you can take a slight cut and fix this before gluing the two halved together.
One purely optional note. The individual pieces are small enough to easily fit on a laser cutter, so I created a pattern and etched each piece. Because these pieces are identical, you don't need a laser cutter. You could create a template to paint or mark your own boards in unique ways before gluing them together.
Step 2: Make the Playing Surface


Start by finding the center of your board. Use a pencil on a string or scrap board to make a mark 13" from the center and trace out that circle. Roughly cut that circle out to make it easier to handle.
Using the center point, drill with a 1 3/8" Forstner bit about halfway through your board. Do NOT drill all the way through, we'll complete this hole after the top surface is completed.
Use some spare dowel rod, something like ~1/4" and drill the same size hole in the center of your board/ forstner hole. We'll use this as the pivot point to cut the board into a perfect circle and route the circle markings.
Use a scrap piece of ply and drill the same dowel rod hole. Make marks at 4", 8", 12" and 13" from that center dowel. For now, we just need the 13" mark, we'll use the other marks in the next step.
Attach your router to the jig so the bit is positioned to cut right at the outside of the 13" mark. Plunge your router through the jig and cut the ply circle out in 2-3 passes.
Sand the edges and apply color or stain at this point depending on the look you are going for.
Step 3: Attach the Surface and Base


Measure in from the sides of your base to help establish where the top surface needs to sit and make some light marks for your reference.
Use ample glue and position the top and base together.
Use some boards as clamping cauls to spread the pressure and get your clamps on!
Step 4: Game Lines and Center Pegs


Game lines:
Using our router jig from before, we can now route in very shallow channels to serve as the game boundary lines. I did this to expose the contrast of the dark board surface, but you could color these channels dark if you left the top surface a light color.
I considered using a v-bit but decided to try a 1/16" straight bit. This is a very shallow cut made using the 12", 8" and 4" markings on our jig.
You could simply use a permanent marker held in the jig and draw the lines on as well.
For the straight edges, I used the center of the octagon sides and center of the board as references to align and clamp a board that I could use to ride my router against. I carefully held my router tight against the board and cut the lines, but this was tense, as any small slip of your hand will show.
Center pegs:
Some boards use small screws surrounded by rubber bumpers as the pegs. I chose to use wooden dowels.
Use the printed guide and align it with the board. Use a punch or nail to mark each peg location and drill the dowel holes. To help drill these correctly, I first drilled a small guide at each mark, then used a board that had been drilled vertically on my drill press as a guide to drill all the way through the board. At this point, you can also finish drilling the center hole through.
Step 5: Walls and Finish


Walls:
For the outer walls of the board, I cut a shallow dado in some walnut that would match the 3/4 ply used for the base. The overall height just needs to reach a bit above the inner playing surface to catch discs being knocked off the surface.
This is a good case where it's better to cut each piece individually rather than assuming you can cut them all at once, the fit will be better if you take the time for each one.
Make your first cut on the trim piece, set at 22.5 degrees, then place it on the board and mark where the next cut needs to be. Cut this piece apply glue and a few pin nails will hold it in place while the glue sets. Cut the trim for the next section, line it up, mark and cut and repeat the process.
Even with this you may have some gaps, but a bit of sawdust and glue mix can fill the gaps if needed.
Center hole:
Use 1/4 or 1/2" ply glued to the underside with a ~10" diameter radius if you used dowels like me. If not the radius can be just enough to glue and cover the bottom of the center hole. Use something heavy to hold it in place for ~30 minutes while the glue dries.
Finish:
I used some brush on poly to finish the board, giving it 3 coats to build a bit of finish. This did not fill in the rings, but the slight dip of the rings has not affected the gameplay so it doesn't matter. I lightly sanded with a high grit between coats and finished the board with wax for a very smooth playing surface.
Step 6: Optional: Alternative Game Mode


The original Crokinole game can be played with 4 people, but I was curious and interested in creating some alternate games as well that could be done with 2-4 people.
One of the reasons I chose to use dowels was in anticipation of creating variations that could be set up using the dowels as holding pins or to remove them.
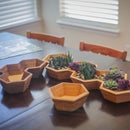
One option I've tried is this idea of setting up additional barriers on the game surface and trying to place discs in your opponent's quadrant while keeping yours clear. You can also alternate the scoring based on where the discs are when the game ends, higher scores, for the more difficult areas. It's a fun variation, especially with 4 players working separately or as teams, each having 10 or 12 discs to use.
To make the barriers I cut the openings identical, except the center was a half-lap joint so they could cross each other. Setting up stop blocks and cutting both boards at the same time made the size of the openings mirrored perfectly and the waste was cut away with a hack saw, bandsaw or scroll saw. Holes were drilled to match the distance of the dowel pins and with a tight fit, it's a really stable board.
I'll include some basic dimensions on the barriers I created in the PDF with this project.
What do you think? What other game modes would you try to create on a Crokinole board?
Step 7: Final Photos and Thanks!


As a reminder, in the video on this project, I made game discs as well. The process for doing so is difficult and time-consuming, so I didn't outline it here. Just buy game discs, they are easy and pretty cheap to order.
That said, I'm really happy with the board and the game is super fun. If you ever make a board using some of these methods, please reach out and let me know and I hope it brings your family hours of fun and laugher.
Cheers!

Second Prize in the
Games Contest


