

Introduction: A Mid-Century Inspired Desk Organizer


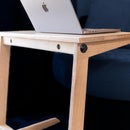

Today, I'll be showing you how I built this solid walnut desk organizer that has a bunch of storage options to help you declutter your desktop. Even if you don't need a desk organizer, the techniques covered in this build can be directly translated toward larger cabinet builds!
There are several things that will be difficult to explain with words and images, so be sure to check out the Youtube video above!
Materials
Walnut Hardwood
Brusso L-37 Knife Hinge: https://amzn.to/2lfFjVB (Affiliate)
Brusso 1/4" Ball Catch: https://amzn.to/2lfH0Cr (Affiliate)
Tools
1/8" Radius Bowl & Tray Bit: https://amzn.to/2No7YTl (Affiliate)
1/4" Downcut Bit: https://amzn.to/2tLRQnl(Affiliate)
White Marker: https://amzn.to/2tD6X2H (Affiliate)
Jointer Push Block: https://amzn.to/2Efn89z (Affiliate)
Microjig Gripper: https://amzn.to/2Efn89z (Affiliate)
Disclosure: All links above are Amazon affiliate links. There are no additional costs to the buyer. The small kickback I receive from qualifying purchases helps me to further invest into my channel and help to support my craft.
Step 1: Milling Blanks


For this project, I marked out all the pieces I'll need for the build on a piece of 8/4 walnut. I first crosscut the lumber down to their rough lengths, and then resawed them to get all the pieces for the case as well as the drawers. I generally mill the workpieces to their final dimensions right before I need them. In this case, I started with the top organizer tray.
Step 2: Organizer Tray Template


But before I start making the organizer tray, I first had to make the template for cutting the pockets using my router. I got the dimensions for the pockets by laying out the things I want to store in the tray (e.g. pens, post-it, etc...). I laid out the pockets on a piece of 1/2" MDF, then cut them out using a drill and my jigsaw.
Step 3: Cut Organizer Tray Pockets


After cutting the pockets out, I attached it to the workpiece with some double-sided tape and then took it over to my drill press to clear out the bulk of the material with a Forstner bit. This will help to reduce the load on the router bit later and will make the routing process much safer. To finish cutting the pockets, I used a 1/8" radius bowl and tray bit to clear out the rest of the pockets, leaving the bottom surface flat, with a radius around the corners.
Step 4: Cut Organizer Tray to Size


After removing the template from the workpiece, I cut it to its final size on the table saw. Since I like to add angles to everything I make, I decided to add a downward slope to the entire top of the organizer. To make this cut on the table saw, I used my tenoning jig to help hold the workpiece. I had to swap the workpiece to the other side of the blade to complete the cut.
Step 5: Organizer Tray Bottom


Before working on the rest of the organizer, I had to edge glue some blanks together to create workpieces wide enough for what I'll need for the case. For the bottom support of the organizer tray, I laid out a big 1/4" deep dado for receiving both the organizer tray, as well as some stationery holders later. I made the cut using my dado stack, sneaking up to my lines until the tray could sit snug inside before gluing them together.
After the glue has had time to cure, I cut the tray assembly down to size, leaving about 1/4" of material on either side. I also cut a notch on the front two corners to help cover up the rounded ends of the dados that this assembly will sit in later.
Step 6: Stationery Dividers


With the tray assembly completed, I laid out and cut small 1/4" thick pieces for making the stationery dividers. I started out with the pencil partitions, which like the tray, will be angled downwards from the back to front. I tilted the blade at an angle to cut the bevel into the top edge on the front face of the pencil partition to match the angle that was just cut into the side face. See the third image, or watch the video, if you find it difficult to follow what's going on.
Next, I used a 1/4" bit in my router table along with a stop block to cut a couple of stop dados that will receive a partition to separate the pencil holder into two compartments.
Next, I laid out the holes for the horizontal divider on top, which will be used to separate pens in the left compartment of the pencil holder. I used a 1/2" Forstner bit at the drill press to cut the holes. Finally, I glued all the pieces for the pencil holder together, then glued it to the tray assembly.
It's pretty difficult to explain this section of the build, so be sure to check out the video!
Step 7: Case Side Joinery


Next, I began to work on the case of the organizer. After squaring up the pieces on the joiner and planer, I edge glued them together to make panels that are the proper width, just as I did in previous steps. After cutting the sides to size, I used a 1/2" bit at my router table to cut stop dados into them for receiving the case bottom, horizontal partition, and the top tray assembly. There will be 3 dados on the left side, and 2 dados on the right side, as you see in the 5th image.
I did a quick dry fit between the side panels and the top tray assembly to help determine the length of the case bottom, as well as the vertical and horizontal partitions, which I cut to size at the table saw. I also cut notches into these pieces just like I did with the top tray in order to hide the rounded ends of the stop dados.
Step 8: Install Knife Hinge (Case)


While all the case pieces are held together with only clamps, I laid out the mortises for the knife hinge. To cut the hinge mortises, I used a guide bushing along with a 1/4" downcut bit in my router. I used a Woodpecker jig to measure the depth of the hinge, and then transferred the measurement over to my router. I clamped the template to the workpiece and cut the mortises in both teh top surface of the bottom panel, as well as the bottom face of the tray assembly.
Then I marked and pre-drilled the holes for the hinge screws. With the male side of the hinges in place, I'm ready to make the door panel.
Step 9: Door Panel


With the male side of the hinges in place, I cut the door panel down to size at the table saw. I'm going to use some sliding dovetail battens to keep the door panel from warping. This traditional Chinese joinery technique results in a very rigid door panel that will stay flat over time while still allowing for wood movement.
To make the battens, I first made some kerf cuts at the table saw, then I cut the dovetail grooves into the panel using a 14-deg dovetail bit in my router table. Without changing the height of the bit, I made the battens by running a workpiece vertically, as shown. Then I cut the dovetail portion off of the workpiece at the table saw, then crosscut it to produce two battens needed for the door.
If cut properly, the battens should be friction-fitted into the grooves of the door panel. There's no need to apply any glue. After flushing everything up with a hand saw and a hand plane, I cut the mortises for the female side of the knife hinges on the top and bottom edges of the door using the same template and router set up as before.
Step 10: Ball Catch Door Stopper


After installing the hinge and checking the fit for the door, I marked the position for the ball catch, which is what will hold the door closed. I first drilled the hole on the bottom edge of the door for holding the ball. The depth of this is critical for the system to work properly, so it's important to sneak up on the fit. Since the ball catch cannot be taken out easily once it's inserted, a trick to get around this is by inserting a piece of floss into the hole before inserting the ball catch. That way, if the test fit shows I hadn't drilled the hole deep enough, I could easily pull the ball out using the floss and drill the hole deeper until I got the perfect fit.
Once the ball has been properly fitted into the bottom surface of the door, I did the same thing to fit the catch on the top surface of the bottom panel.
Step 11: Final Glue-up


Before gluing everything up, I did another dry assembly to layout and cut the final profile of the side panels. Which will have a downward slope to complement the organizer assembly on top. The layout lines I drew was just to help me prevent mixing up the cuts between the right and left panels. So they didn't have to be exact. Using my miter gauge, I made the first cut at about 15 degrees to both of the side panels. Then I made a second cut at around 22.5 degrees.
Once the profile of the side panels was completed, I sanded everything up to 220 grit before gluing the case together. And after the glue dried overnight, I came back out the next day to apply finish to the entire case.
Step 12: Drawers


While the finish cured on the case, I began to work on the hardwood drawers. I ripped all the drawer pieces down to width, and then crosscut them to their final lengths at the table saw. Then, at the router table, I cut a 1/4" dado into them for accepting a drawer bottom. The drawer fronts and backs will receive rabbets on both ends for attaching to the drawer sides. You may notice that the drawer backs aren't as tall as the rest of the sides. The reason for this will become apparent later.
The drawer bottoms will be 3/8" thick, with rabbets cut around 3 of the sides, leaving 1/4" material for sliding into the dados of the drawer sides cut earlier. I also cut two notches along the back edge of the drawer bottoms. This slot will allow me to use screws to hold the drawer bottom to the back panel, but will still allow for wood movement. In the 10th image, you'll see how all of this will come together. It will also show why the back panel had to be shorter than the other 3 panels.
Next, it's time to attach the drawer pulls. Since the drawer pulls I used are small and friction-fitted, all I needed to do was drill the proper size hole in the center of the drawer fronts.
Step 13: Final Install and Back Panel


I applied finish to the drawers and door off camera before installing all the brass hardware and installing everything back to the case. Before making the back panel for the case, I added some strips of offcuts behind the drawers to act as a positive stop for when the drawer closes, keeping it flush to the front of the case.
The back panel of the organizer will be joined together with a shiplap joint to allow for wood movement. After cutting the pieces down to size, I cut rabbets into them on the router table. Before attaching the back panel to the case, I did a quick dry fit to lay out the angled cut along the top edge to match the downward angle of the sides.
Using some offcuts as spacers, I kept a 1/8" gap between the panels, then attached them to the case using only a few brad nails to finish the assembly.
And with that, the organizer is complete!

Grand Prize in the
Home Decor Contest


